Showing posts with label dessert. Show all posts

Sunday, February 11, 2018

Brownies!!

I don't work on the weekends. Well, I don't work at Starbucks or Home Depot. I do work at home, doing things like housecleaning or laundry. You know, the usual things. I used to work weekends. Almost every Saturday and Sunday. Then, two years ago, I had back surgery and while recovering I decided that when I went back to work it was only going to be Monday - Friday. I figured if my bosses valued me, they would take me whenever I was available. And, they did. So, I now work Monday thru Friday from 6AM to 4PM. That's at both jobs. 5 hours at Starbucks, an hour off and then 4 hours at Home Depot.

But, I digress. This post is supposed to be about brownies.

While scrolling through my Facebook feed a week or two ago, I stumbled across a link to Peanut Butter Cookie Brownies. The pictures looked amazing and I saved the link for a time when I could make them. That time was yesterday afternoon, after I finished making my Pineapple Upside-down cake.

The recipe for the brownies was actually two part. You made a brownie recipe, either a box version of your favorite brand, or in my case, a scratch recipe for brownies.


 Once that was made, I made the peanut butter cookie recipe. The recipe, that I will post at the end of this post, called for baking the brownies in a 9" pan. I wanted to surprise my Home Depot coworkers with them so I needed more than what a 9' pan would yield. I made them in a jelly roll pan.


Anyway, aside from the different pan, I basically followed "The Little Kitchen's" recipe.


These brownies are amazing! Super chewy, moist and delicious! I used King Arthur's black cocoa powder in place of dutch processed and it gave the brownies a darker, richer depth than regular dutch cocoa would have. I used Ghirardelli  bittersweet chocolate in the brownies. It's my favorite brand of chocolate.


Give these brownies a try. I promise you won't be disappointed.


https://www.thelittlekitchen.net/peanut-butter-cookie-brownies/

Saturday, February 10, 2018

Pineapple Upside Down Cake, in a cast iron skillet

I recently joined a group on Facebook called Cooking with Cast Iron. I own two Lodge cast iron skillets, one 10" and one 12". I hadn't been using them, haven forgotten about them. They were in the bottom of a cabinet, just waiting to be brought out into the light again.

So, after joining the group, I've been making an effort to use them. I've made many dinners in them. Pork Chops with Apples, Goulash, Tuscan Sausage and Peppers. The list goes on. However, I haven't done many sweet things in them.

A little back info to this post is that I work at Starbucks. I work with a bunch of really great people and I often bring in "tasty treats", as one coworker calls them, for the gang. I satisfy my baking urges and I don't have all those fattening things here in my house, with only me to eat them. :)

Friday one of my coworkers suggested Pineapple Upside-down Cake as a tasty treat for Monday. I realized that while I have made Peach Upside-down Cake (my Mom's recipe), I had never attempted a pineapple version. Challenge accepted. :) And, while I usually make my Mom's recipe in a cake pan, I decided to use my 12" cast iron pan instead.

The recipe was a simple one. Butter in the pan. Brown sugar on that. Pineapple slices over that.


 A quick batter mixed up and poured over top. I used the liquid from the pineapples for the liquid in the recipe and added a teaspoon of vanilla.


 Baked for about 25 minutes. I let it cool for about 5 minutes and them flipped it onto a cake circle as I have no plates large enough for a 12" cake.


It turned out very well. Delicious, actually. Edges have a little bite of bit to them. That crunchy kind of bite that comes from sugar caramelizing around the edges of a pan. Adding the pineapple juice as the liquid was a good move because it also added a little extra flavor. While I think I still prefer my Mom's peach version, this was pretty darned good. I think the crew at Starbucks will be happy come Monday morning.

http://www.geniuskitchen.com/recipe/pineapple-upside-down-cake-in-iron-skillet-42861#activity-feed

Tuesday, April 26, 2011

A day off - Vegetarian Lasagna - Orange Scented Chocolate Cheesecake

Hey there. Hi there. Ho there. It's me. Thought I would drop in and say hi to any followers who might still be following me. :)

I had a day off today. A day off  from my house cleaning business and a day off from Starbucks. That meant I could sleep in and play in my kitchen. Playing in my kitchen makes me happy. In fact, playing in my kitchen makes me very happy. I knew ahead of time that I would have today off and had chosen a couple of recipes I wanted to try. One was for my Chocolate with Francois group and the other one was a practice run of an all vegetable lasagna. My beautiful daughter-in-law, who is pregnant with my first grand-child, is a Vegetarian. I am getting together next week with her and my son, my daughter and her hubby and we are going to have dinner together and play Quelf, a really fun board game. It will probably be the last time we can all get together before Baby Gulla is born. I plan on baking a pan of the vegetable lasagna and putting it in the freezer so that Sean and Katey have something they can just heat up and eat when they come home from the hospital with the baby. At least one night they won't have to worry about cooking dinner. :)

So, today I decided I would make a vegetable lasagna that I had come across a recipe for. It's from Italian Food Forever and it sounded easy and yummy. I even made the home-made sauce she links to. I used my submersible blender so that there wouldn't be chunks of tomatoes but kept to the basic sauce recipe.

I also bought my lasagna noodles. I do have a pasta roller, but I use it for my cake decorating business. Besides, I was more interested in what was going between the noodles rather than the noodles themselves. The recipe suggests using eggplant, roasted red peppers, fennel, and onions. I could not find fennel anywhere (and should confess here that I wouldn't know fennel if I bumped into it) so I decided to go with zucchini, eggplant, red peppers and onion. Knowing my hubby and his "it has to have meat or it isn't dinner" attitude, I bought some "Gimme Lean" sausage style veggie protein. I know, it isn't meat, but, I wanted to see if he would even notice.

I also cheated by buying roasted red peppers in a jar. I could have roasted some, but, I don't have a gas stove, it's electric. I do have a gas grill, but hated to crank it up to roast three red peppers. Thus, the jar of already roasted peppers.

I made the sauce first. It was super easy. Heat up some oil, drop in some minced garlic, pour in diced Italian style tomatoes, bring to a boil, lower heat, add salt and pepper and fresh chopped basil. And, any other spices or seasoning you would like. Super easy and really good.

I worked on the veggies next. Sliced the eggplant, brushed it with olive oil and grilled it under the broiler. Sauteed the onions till they were soft and light brown. Sliced the zucchini and sauteed that up. Fried the "sausage". Drained the roasted red peppers. Once I had all the ingredients cooked and on separate plates I began to assemble the lasagna.

A little sauce on the bottom of the baking dish. A layer of noodles. A little more sauce. Some "sausage", cheese and eggplant. Cover with noodles. Sauce. "Sausage". Cheese. Roasted red peppers. Noodles. Sauce. "Sausage". Cheese. Onion. Final layer noodles, sauce, "sausage", cheese, zucchini. Last layer of noodles, a little more sauce and a good amount of cheese. Covered the whole thing with foil and put it in a 375 degree oven and baked it for 45 minutes. The recipe on Italian Food Forever doesn't call for covering the dish with foil and it bakes for a shorter time, but I think that's because the noodles are fresh made rather than boxed.

The lasagna smelled fabulous while it was baking and looked wonderful when I took it out of the oven. I let it set for about 20 minutes before cutting and plating it.

I loved it!! So many flavors blending together. It was not greasy or overly heavy like some lasagnas can be. The vegetables were soft but not mushy. There was just enough sauce, not overpowering the dish or drowning the noodles, but just enough to enhance the flavors of the veggies and bind the noodles, cheese and veggies together. What was even better was that the hubby also loved it! At one point he asked about the ingredients, wanted to know if it was all veggies, besides the sausage. It was then that I told him the truth about the "sausage". He shrugged and kept eating. Success!!

Even if you aren't a Vegetarian, you should try this lasagna. Trust me when I say you won't miss the meat that's not in it. Or the ricotta cheese that's not in it. Or the eggs. Just roast or grill some veggies. Layer them with some shredded Mozzarella and Parmesan cheese. A little sauce and you are good to go. :)

In the title of this post I mention an Orange Scented Chocolate Cheesecake. That recipe is from my CWF group and it is my pick for the month of June. According to the rules of our group, I am afraid I can't post my review until the 30th of June. But, trust me (again) when I say you need to come back at the end of June and get the recipe for it. Wonderful! Light yet rich. Orange and chocolate flavors blending together. A tender, sandy, sable' crust. The cheesecake baked up tall and beautiful. I really liked it. The hubby thought it was okay. He said I have made better cheesecakes before. However, he is not a big orange/chocolate combination fan. Guess you will have the try the recipe and decide for yourself.

I will be back on the 30th of this month, if not before, to post the latest CWF review...Chocolate Tiramisu. This was unbelievably delicious! I kid you not when I say that the 11/2 quart bowl I made lasted just over two days. And, there were only two of us here to eat it. :] You can find that recipe at Seattle Pastry Girl's blog. It's worth the effort. Trust me. :)


Sunday, February 14, 2010

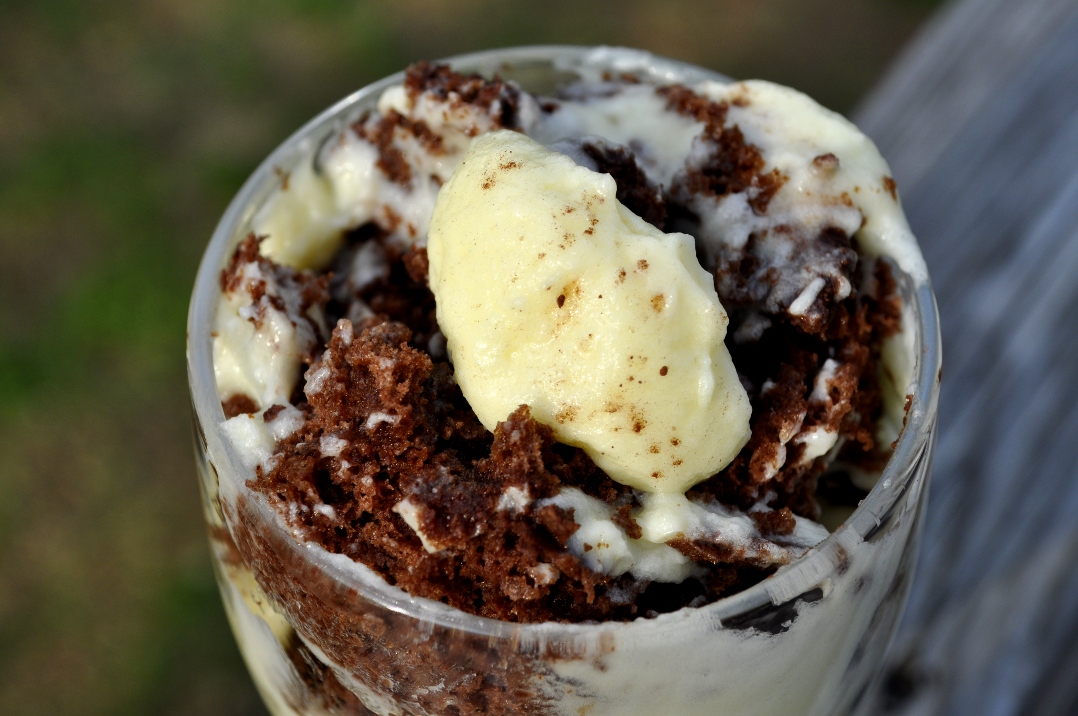
Sweet Melissa Sunday - Easy Chocolate Mousse and (at the end) the TAQ award.

Ahhh, Valentine's Day. Love is in the air. The stores are filled with hearts and flowers. It's the most wonderful time of the year. No, wait, that's Christmas! Anyway,  even my hubby, who is normally not a very romantic kind of guy got into the swing of things this morning. He woke me and said "Come on, I'm taking you out to breakfast". And, he took me to the most romantic breakfast a girl could ask for, wait for it,...at Hardee's! :D That's my guy. Gotta' love him. And, I have for for the past 23 years, almost 20 of them that we have been married. But, I am getting all teary eyed now and I need to concentrate on my post. Which isn't about how romantic my hubby is, but about this week's SMS which is Easy Chocolate Mousse.  Spike of Spike Bakes chose the recipe for SMS this week, and you can find it, along with pictures of her results over at her blog. Thanks Spike for a great pick!

This was just as the recipe stated...easy. My only complaint, if it's even a complaint, is that my chocolate didn't completely blend with the egg white/sugar mix and I have tiny pieces of chocolate throughout the mousse. I personally don't mind it...I like finding the little morsels. I had thought about adding mini chocolate chips or chopped toasted almonds, but decided to leave well enough alone and serve it just as it was.

What a wonderful dessert. Light yet rich, creamy, chocolate-y. I dusted mine with a hint of dark cocoa powder, just to give it a little something. I was going to save out a tiny bit of the whipped cream for on top, but forgot. :( That's okay. It's perfect just the way it is.  Head over to SMS to see what everyone else thought of this one.

Now, I want to give a big thanks to Chaya of Sweet and Savory for the second award I won last week. Last Thursday night I came home after a long day (cleaned one church, three houses, had a doctor's appointment and met my kids for dinner all before getting home at 8:00 at night) and found a comment from Chaya directing me to come get an award that she left me, one I didn't even have to lie for! :) It's the TAQ award and it's for photography! She loves the photo on my header of the path between the trees. That's actually my driveway. I had one up I took in the fall, but have changed it to a snowy one. I am not sure which one Chaya liked, but it's an honor to be recognized for my photography. I consider myself a bit of a photographer. I have won several ribbons at the country fair, and one year took the grand champion ribbon with a b&w photo of my son taken when he was about 4 or 5 years old. So, to have someone in the blogging world pass me a photography award...well, it's pretty special to me.


I am supposed to pick 6 people to pass this award onto, as well as post some pictures I have taken. I have posted 4 that I personally think are  good. I know photography is objective so some may not think these are anything special, but they are to me.

As for picking the 6 bloggers whose photography I admire, two women came to mind right off the bat...
Mimi of Mimi's Kitchen. She takes the most amazing pictures of everything she bakes. I love seeing what she's done each week.
Holly of Phe/MOM/enon is another blogger whose food pictures look so beautiful you feel as though you could just reach out and touch them. Fabulous.
Susan of She's becoming Doughmesstic is another fabulous photographer. Her artistic eye is just amazing.

Karen of Karen's Cookies,cakes and more. Each Sunday I am always amazed at the photos she posts of her latest recipes.
Tracey of Tracy's Culinary Adventure's also has a great eye when it comes to photography.
And, lastly, Steph of a Whisk and a spoon. Great lighting, sharp, delicious looking photos!
As with the last award I passed on, I am sure that there are many, many others out there deserving of the TAQ award. But, these are the bloggers who first came to mind. To those of you I nominated to receive this award, please post a picture or pictures that you particularly like. And, of course, pass the award on to 6 others. :)

Wednesday, February 3, 2010

Apple Kuchen and Chicken Meatloaf "Muffins"

Ever since my trip to Germany in October of last year I have been thinking about the fabulous apple dessert I had my first day there. Apfelstrudel. It was apples wrapped in a pastry dough, dusted with confectioners sugar. Ordering it I spoke my first German and was so proud when I was understood. (I spent several months teaching myself how to speak German listening to CD's while driving).

I recently came across a recipe for making an Apple Kuchen from Recipes from a German Grandmother. The site is full of all kinds of German dishes, as well as links to all things German. When I saw the pictures of the dish Apple Kuchen, I knew I had to try it. I had everything on hand I needed to make it and figured it would be a good way to spend an afternoon at home.

Very simple recipe, easy to put together. I have to confess that I messed up several of the steps. I made it while looking from my laptop to my counter where all the ingredients were and back to the laptop. The recipe on the site is laid out with a lot of pictures and few words. I guess I was looking more at the pictures and less at the words and put things together in the wrong order, or missed somethings all together. (Hangs head in shame.) I am surprised it came out at all!

The dish is good, but not great. Maybe it would have been better had I followed the directions correctly. :) I think the addition of raisins would be great. I also think half the amount of dough would be better. Seemed too thick around the edges. I  think thinner slices of apples would have been better. I like my apples soft and these still had a little bite to them. And nuts. I think nuts would be good too. But, over all, I did like it. It's apples, cinnamon and custard. The custard is almost an afterthought. Just a little moisture in the dish. But, try it for yourself, see what you think.

                              Apple Kuchen with Custard and Streusel Topping
Ingredients:
Basic Coffee Cake Dough

2 eggs, well beaten
1/4 cup milk, warmed
1 pkg. (or 1 tablespoon) dry yeast
1/4 cup warm water
1/2 cup butter (1 stick, melted but not hot)
1/4 cupsugar
1/2 teaspoon salt
1 tsp. grated lemon peel
3 cup flour, more if needed
  
Pour lukewarm water, yeast, and sugar in mixing bowl. 
Add melted (not hot) butter, warmed milk, salt, lemon peel, and beaten eggs. Mix well.
Add flour, 1 cup at a time, mixing well after each cup. Add more flour, if necessary, to make a smooth dough, and turn out onto a floured surface.
 Knead very lightly.
Let rise for about 1 hour; punch down and let rest for 10 minutes. Meanwhile prepare apple and custard toppings.
~~~~~~~~~~~~~~~~~~~~~~~~~~~~~~~~~~~~~~~~~~~~~~~~~~~~
Apple Topping
4 medium sized apples (I used 2 Grannies and 2 Galas)
1/3 C. vanilla sugar
2 teaspoons cinnamon
1/4 cup melted butter (This was one of the things I missed while putting this together)

Peel and core apples, then cut into ¼ inch slices.
Spread dough in 2 well-greased 9-inch round or square cake pans, pushing it up on the sides as for pie crusts. (I used a 13x9" pan instead of two 9" pans)
Stagger the apples in rows(or in random fashion if in a hurry) on top of dough. Drizzle melted butter over the fruit and crust, sprinkle with cinnamon and sugar. (Totally missed this step too and just tossed everything together in a bowl like I would for an apple pie) Let the dough rise for 30 minutes.
Bake for 10- 15 minutes at 375 degrees to set the crust. (Missed this step too! :} So embarrassed!)
Remove from oven.Top with the custard and the crumb topping. If you want you can just add the crumb topping and bake it without the custard.
~~~~~~~~~~~~~~~~~~~~~~~~~~~~~~~~~~~~~~~~~~~~~~~~~~~~
Custard
1 beaten egg
1 cup cream or 1/2 cup sour cream with 1/2 cup milk
2 tablespoon sugar
1 tablespoon vanilla extract
Mix all ingredients in a bowl. 

Crumb Topping
1 2 cup bread crumbs
1 tablespoon cinnamon
1/2 cup melted butter
Mix all ingredients in a bowl. 

Cover the apples with the custard.
Then sprinkle crumbs over the custard and continue baking at 350° for 30 minutes longer. Until the custard is set and the apples are completely cooked.
Cool and cut in squares and serve topped with whipped cream. Store in fridge, this cake
gets better after a day. It will keep for a week at least properly stored.


 The other recipe I tried yesterday was one of my own creations and it turned out fabulous! Unfortunately I didn't take any pictures of it as I wasn't thinking about posting it in my blog.  I had some ground chicken and decided I wanted meatloaf. I added some carrots, onion, green pepper, egg white, bread crumbs, fresh rosemary, and a little barbecue sauce, stirred it all together and then used a large ice cream scoop and put two scoops of the mixture into the openings of a large muffin tin. I had 8 ounces of ground chicken and it made 4 -2 scoop meatloaves. I baked them for about 35 minutes. They smelled delicious cooking and tasted just as good. The bottom had just enough of the crust I like in a meatloaf. You could see the carrots and green pepper peeking out. They were moist and so good! I think I surprised myself with what I created and just how good it was. I served it with some brown and wild rice, fresh baked Artisan bread and a green salad...dinner was healthy, easy and delicious!

Chicken Meatloaf "Muffins"

8 ounces ground chicken (or turkey)
2 small carrots, peeled and finely diced
1/4 green pepper, finely diced
1/4 yellow onion, finely diced
1 twig of fresh rosemary, chopped
1/4 cup barbecue sauce
1 egg white
1/2 cup bread crumbs

Mix all ingredients in a large bowl. Using an ice cream scoop, measure out two scoops of meat mixture into the openings of a greased large muffin tin. Drizzle a small amount of barbecue sauce over each "muffin". Bake in a 350 degree oven for about 35 minutes, or until thermometer registers 180 degrees. Enjoy!

Saturday, January 30, 2010

Chocolate with Francois - Chocolate Pets De Nonne

This month's recipe was Chocolate Pets De Nonne and it was chosen by Maggie of The Other Side of 50.  The name literally means "nun's fart". Not exactly a name that would make you want to rush out and make them. :) But, rush out and make them I did.

I decided to halve the recipe. I have been trying to not only cut back on expenses to help the budget, but I have been trying to cut back on the amount of dessert items in the house. My hubby and I are trying to re-lose the weight that tracked us down and found us, after we lost it last year. Darn weight! Anyway, I thought half of the recipe was okay. Figured I'd end up with about 10 of the "nun's farts" and that would be fine.

I am not sure where I went wrong. But, something went horribly wrong that day. The recipe came together easily. I ended up with a nice smooth dough. But, my dough was a bit more like batter. Not runny, but I would not have been able to pick it up and make balls out of it.

I heated my oil up in a pan, being sure to watch the temperature. When all was ready I used a small scoop I have to drop small balls of the dough into the oil. Things got really ugly at that point. The balls of dough that are supposed to fry up into beautiful doughnut hole shapes (see Maggie's pictures; her's are perfection!) spread out in the oil like those snakes you get around the fourth of July. You know the ones I mean. You light it and this black thing starts slithering out from nowhere onto the sidewalk. Well, picture one of those snakes in a pan of oil. Let me tell you, it wasn't pretty. Oh, but what was even less pretty? When I took those Pet De Nonne out of the pan. I am going to attach a picture just so you can understand my horror at what I created. No "nun's farts" here. I created "nun's poopies"! Excuse my mouth, but that is what I thought the things cooling on my paper towels looks like.I think I got one or two small round balls, then it all went to h*** in a hand basket.  Not good. Not pretty. Fail! :(

After looking at a couple of the other bakers finished products, I may try this again. It sounded so good...chocolate doughnut holes, fried and then dusted with powdered sugar. If you would like to see how the other bakers fared with this one, check out CWF! I sure hope I have better luck next month when it's my turn to host!!